Photoshop comp exercise
- Cade-Mason
- Sep 25, 2020
- 5 min read
Updated: Sep 29, 2020
In photoshop, we were given 5 images to use from google classroom. Those images would help create a composition of the image.
These are the 5 images we worked with:


I opened up photoshop and created a new composition these were the settings of the new document for our exercise comp:

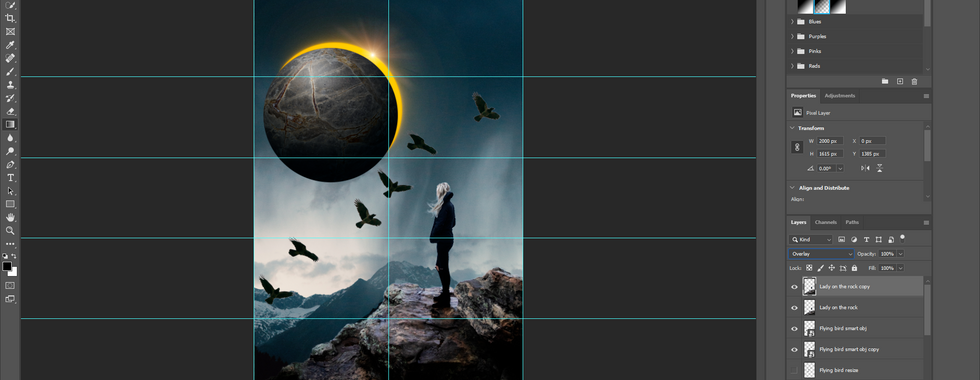
Once the comp was set up, I created guides/rulers to create the rule of thirds for my composition. Afterward, I added the 'lady on the rocks' image. By doing 'file > open embedded'


To make sure I had the right resolution and pixels for the image I had to use the 'place embedded' option to fight the 'lady on the rock' image onto the composition poster.
Afterward, I selected with the 'quick select' tool, and then with the lady part of the image, I feathered the edges around the hair for the lady and then proceeded to the rocks after in order to make. A method I did to help feather the edges and certain portions of the image was that I changed the transparency of the image multiple times to see the effect of the edges on the selected portion of the image those being: the lady and the rocks. Having done all of that I created a new layer by copying the 'lady on the rock' (which was renamed to that earlier on in the composition) layer by doing 'layer > new > layer via copy.'


The next thing I did was I grabbed a new image into photoshop which is the scene with mountains and an overview of the composition.


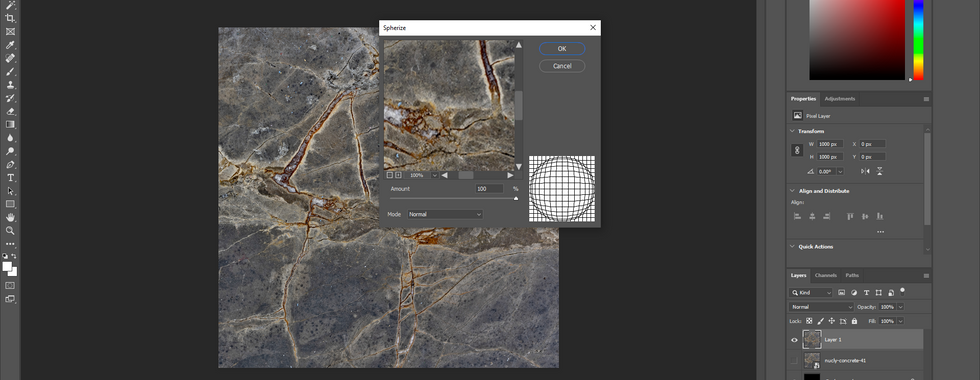
The next step for the comp exercise is to grab a new image, this image would be a textured image for the planet which plays into the comp exercise. I scaled up the image by doing transform (CTRL+T) > then hold alt or shift to scale the image. That way it doesn't lose resolution. After scaling the image, I copied my rock texture layer by pressing CTRL+J on the selected layer. Then moving the scaled image around until I was satisfied with the texture for the planet. Afterward, I did 'filter > distort > spherize.' and for spherize, I increased the amount to a 100. Once spherized, this can distort the majority or a minority portion of the image into a sphere. I copied the spherized version of the rock into another layer. And that is how I created the planet layer for the comp!


Having done with the planet, I dragged the planet layer into the comp and placed it carefully into the guides, these guides act as the rule of thirds for the comp. Using the rule of thirds technique is an efficient and useful method in maintaining accuracy, size, and scales of the image itself.


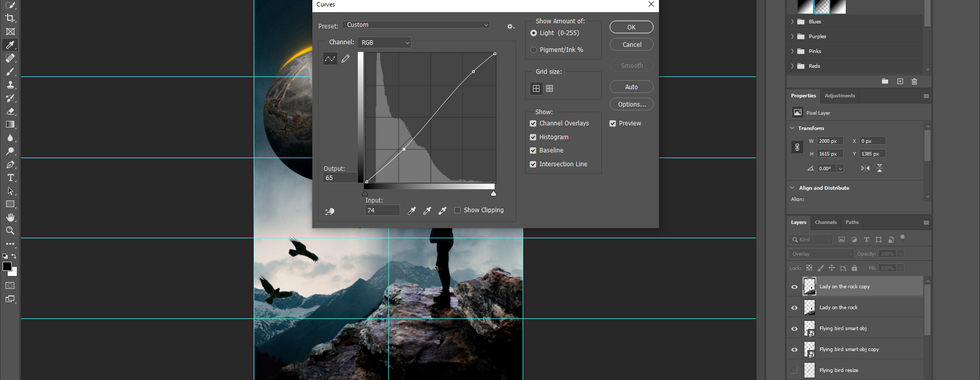
Once placing the planet into an area I wanted to be placed in. The next step was to get the flying birds and mess around with the curves, lighting, contrast, and shadow. What I was aiming to do with the flying birds is that I wanted them to a completely dark variant. The first thing I did was I copied the layer by doing CTRL+J. From there I went into 'Layer > New Adjustment Layer > Curves.' I would change the axis and points across the curves channel. Once that was done, I went into the 'channels' tab which is located on the bottom right of the layers area and then selected the whole image and did 'select > inverse' To preview the selection of the image I turned visibility off for every other layer.


I dragged the birds into the composition and placed the birds where I wanted them to be. Then I scaled the birds and rotated to a degree where it looked good enough and I copied the birds again.
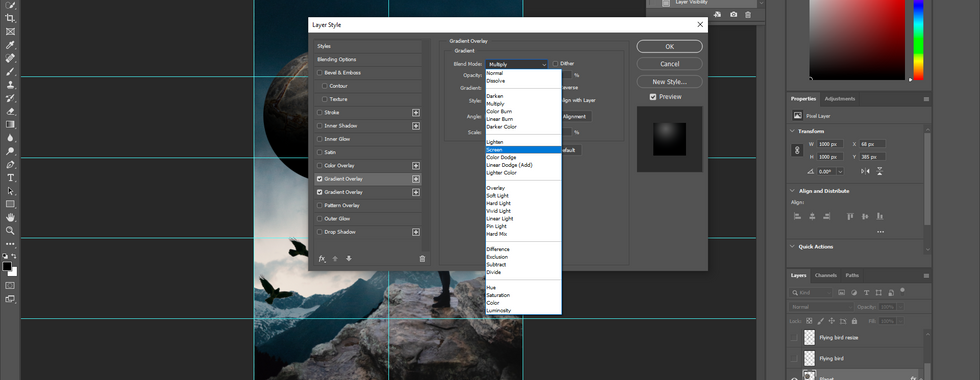
Once the birds we're dealt with, for the time being, I double-clicked on my 'planet' layer and used the 'gradient overlay' style. In these images, these will show you the process to create a new circle, the settings, overlay I am using for the 'planet' layer.


For the blend node, I used 'Screen'. I changed up the opacity to get a feel of the lighting for the planet.


The planet is selected and moved the circle by a few arrows. 2-3 ups and 2-3 rights


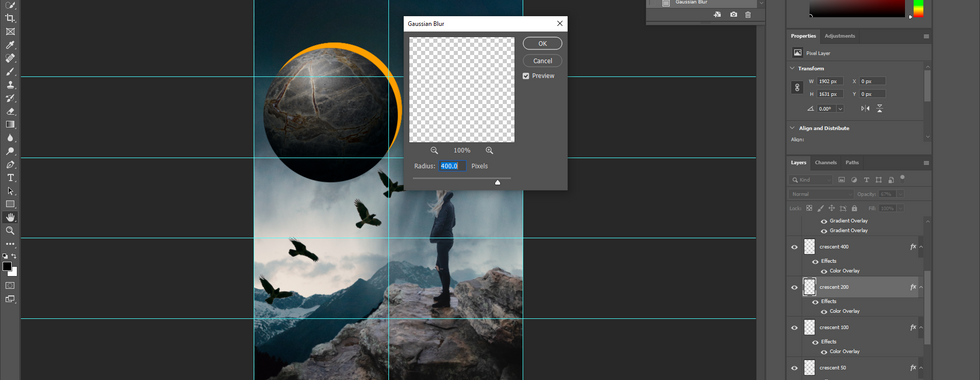
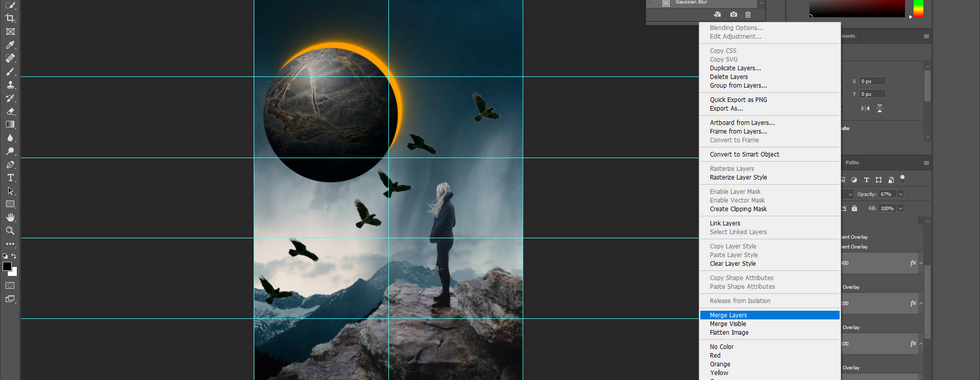
For the circle/crescent layer, I added 'color overlay'. Afterward, I created multiple layers for the crescent itself the layers would range from 1-400. Starting the value at 400, I halved the number sequence until I got to around the lowest single-digit whole number is 3. The sequence goes like this: 400 > 200 > 100 > 50 > 25 > 12 > 6 > 3. The reason why they have those specific numbers named on each layer is that I can use the 'gaussian blur' tool. Having done that I merge all the crescent layers together and renamed the merged layer to 'big glow'. In the blending node, I changed the 'big glow' layer to 'screen' Once I change the hue/saturation and lightness for the big glow layer. I added a 'flare' image into the composition. This flare would go on the top half corner of the planet.


Once the flare was put in place, I masked the flare layer and then started to erase an exaggerated portion of the light coming from the flare itself. The next thing I had to do was to add a mask into the 'flare' layer. Afterward, I copied the 'lady on the rock' layer.


Then in the copied 'lady on the rock' layer, I went into curves and made new points on the channel table. However, when I made these points, I needed the points to be close to the original line and from there I would make new points for each channel. (Red, Blue, and Green). Having changed the RGB values in the channels I changed the visibility in the copied 'lady on the rock' layer to non-visible.


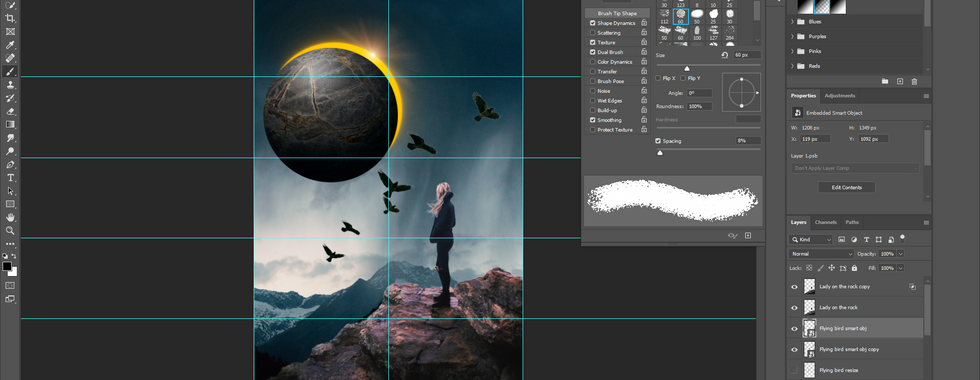
The next part of the comp was that I created the clouds on a brush. This brush would go over one lot of flying birds to create a layer for our composition. I scaled the one layer for the flying birds. I changed the brush settings to produce my own version of a cloud. Spacing helps by creating the spacing and the size of the brush making a different variant of the original brush..


I pressed Q key making the layer red. And from there I used the marquee tool. Now on the red portions of the image, anything that wasn't selected by any of the select tools would turn to red. I used the elliptical marquee tool to mask the composition that weren't red and did rotations around the select tool. Then did 'select > inverse'. Once inverse was selected, I used the 'curves' option (CTRL+M) and added two more points into the graph and made changes to the graph itself. This would change the light and shadow to meet the lighting of the glow coming from the crescent and flare. Then finally I added gradients and noise which applied to the planet.


Conclusion:
Overall I had fun and I learned a couple of new techniques and tools in the making of this composition (i.e Gaussian blur, curves). The purpose as to why we're producing and going through the composition exercises is that for one of our projects, we're making our posters for the movie, "The Tower That Never Was."
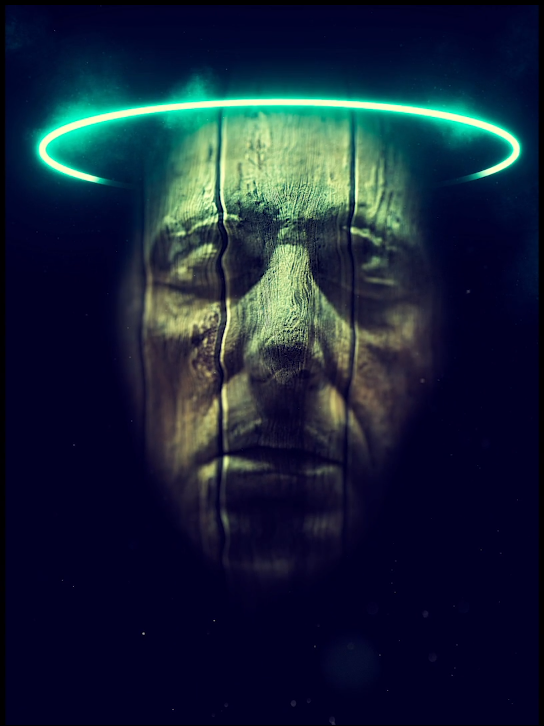
Here is the final composition for exercise 1:


Comments