3D asset series: - The Tower That Never Was - The Revolver part 4 - Asset render set up and UVs
- Cade-Mason
- Apr 2, 2021
- 3 min read
Before I started the rendering process, I had to make some changes and amendments on the UV shells of the geometry of the revolver.


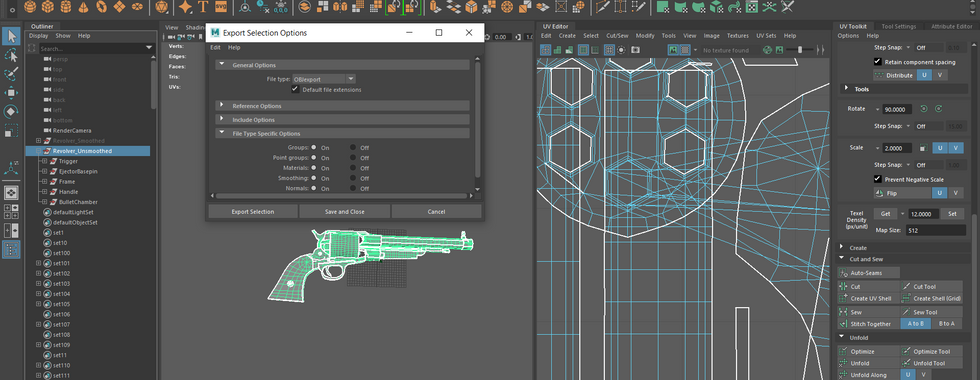


One comment that was mentioned prior to the feedback from Sam was that there needed to be very few UVs on each part of the model. Due to my issues with some UVs being small and all other place, I had to tidy up the UVs. It all came down to cutting, sewing, stitching the edges together, unfolding UVs and straigthen the UVs to make it all neat and tidy. I did whatever I could was best fit for the UVs and I've spread out each piece onto its own respective tiles.


A lot of trial and error was involved in the process of tidying the UVs out. Had an unrecognised file type in the last image. Therefore, had to take a stepback and work on things again.


I had made the improvements over the UVs on my revolver asset. That said, I was curious to see if I could get the revolver exported properly so I did an FBX export and opened Substace Painter. From there, I tried loading the 3D scene and there multiple errors for it. Only this time however, they told me what the errors actually were. Therefore, I went back into Maya and began solving the errors.


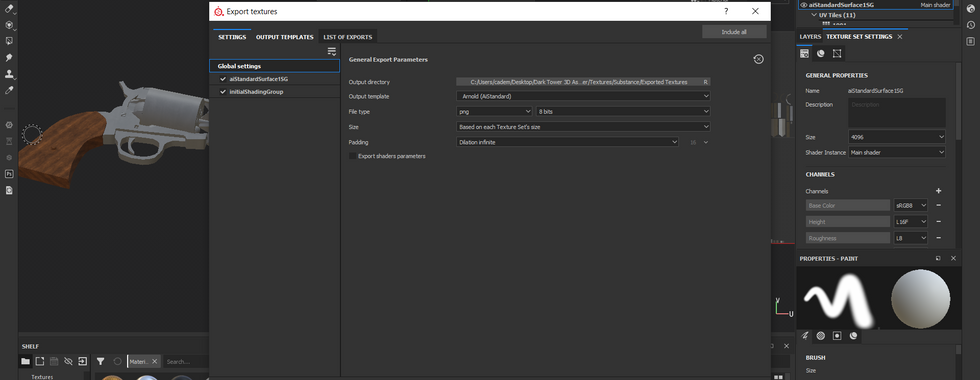
Once that was out of the way, I moved onto substance painter. I exported the file as an '.obj' file and opened up the substance painter software. I felt relieved once I was able to load the 3D scene into substance painter. It shows that I was making progress.
In substance painter, I went with the PBR settings and began to bake the textures onto the asset. Once that was the rendering process for textures were done, I created a new layer above 'layer 1' to paint and mask the textures for certain parts in the uv layers. I masked the layer by clicking on each part of the UV itself. From there, I implemented the materials onto the asset.


I was applying smart materials onto my assets. The smart materials have a group of layers inside of them I turned visibility on and off to see how each layer worked a couple of layers were obvious such as base color, noise color.


I rendered in Substance Painter with the camera icon on the render window. Once I had rendered the revolver in substance painter, I went back into Autodesk Maya. From there, I got my texture files ready to be used. I opened up the hypershade window (via Maya)


To create the HDR scene in Autodesk Maya, I did 'create > lights > Ambient Light'. Inside the attribute editor, I changed the light type to 'Ai Sky Dome Light'. I applied the 'file' material into the color attributes. For the revolver, I applied a new material 'aiStandardSurface'. I opened up the 'hypershade' window. In the hypershade window, I got my textures and applied them to their appropriate components. I used the arnold renderer as a preview to see how the textures are presented for the scene. In the arnold renderview, I previewed the scene every time I attached a material inside the shaders when applying them to the correct component. After I attached the materials to the components in the hypershade window, I then went on to use the arnold rendered. I captured snapshots by using the camera icon on the bottom right corner.


Here is the rendered shot of the Revolver:

Overall, I am quite happy with how the revolver turned out. Whilst having difficulties making adjustments to the revolver, I managed to learn new solutions on improving and fixing assets. Shockingly it took me roughly 6 months to complete an asset. This was due to the case of working on other units and working on the other assets for this unit.


Comments