Task 2 - ‘The Tower That Never Was’ - ‘Portal’ VFX shot - Creating the composition
- Cade-Mason
- May 11, 2021
- 6 min read
Following on from the VFX pitch document task, I opened up Nuke, downloaded the video(s) I wanted to use. I used one video for my composition
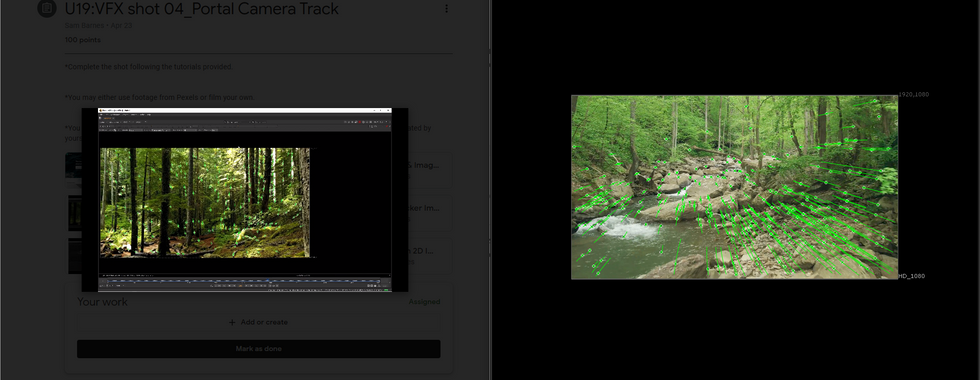
Here is the video that I used for my composition:
The reason I chose this video is that it was set in a forest secluded around the woods and river itself. If you were walking in forests, you might end up finding something out of the ordinary or something that is out of place. In my case, adding the door (portal) around the river would come off as odd and out of the ordinary.
Let's talk about the process of how I went about creating my VFX shot.
I followed Sam's tutorials on YouTube.
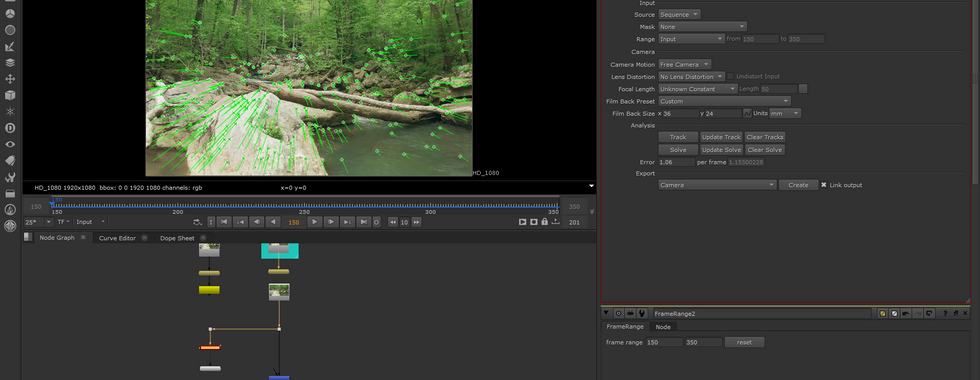
In the project settings, I set up the project folder for the VFX composition. I downloaded my video in full HD from there, I opened up the video as a 'read' file. Afterward, I added a 'framerange' node. I added another read node of the same video itself.


I added a 'postagestamp' node and labeled as 'assets'. Furthermore, I added 'merge' node. I spreaded out the nodes in the 'node graph because it makes things look nicer and more nodes will be added on later on the composition.
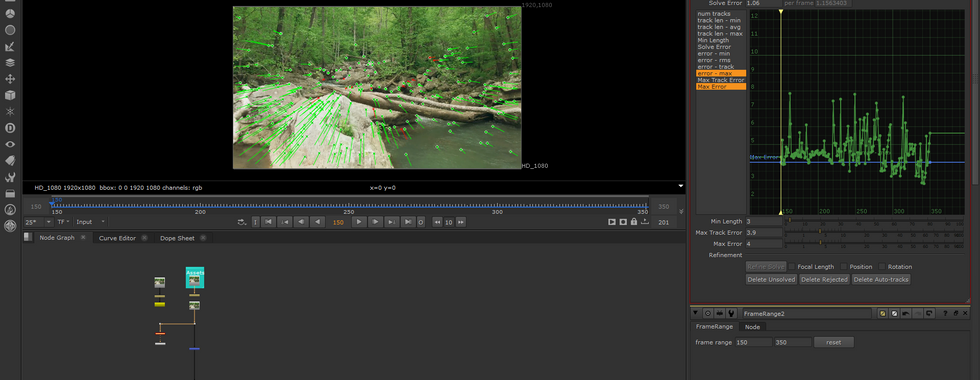
I added the 'cameratracker' node to track the camera. As this was a video I downloaded from the internet I had no idea what camera settings was used to record this shot. I made assumptions about the shot composition. I did 'track' and let the camera track for itself. Once that was tracked, I looked at my 'error' points from tracking. Anything below a 1 is good. 1-2 is satisfactory and above 2 has problems and needs to be amended.
I had a look at some of the tracking points, each tracking point had info for errors, colors of the tracking points. (The red
points were unnecessary points, the amber points are in the middle) you could get rid of the red and ambers by doing 'solve'. Only the green tracking points would remain as they are good tracking points and often their error points are under '1'. I solved the tracks to get rid of the red and amber tracking points.
I went into the 'autotracks' tab to see 'error - max' and 'Max Error' and delete unsolved and rejected tracking points. The 'error - max' and 'Max Error' shows graph values based on the points for where sit. Once that was done I did 'update solve'.
Afterward, I measured distances for trees
For the frame range, it was originally, 50-350 however, I crammed it down to frames 150-350.


After I did the tracking, I opened up new nodes (via camera tracker) and put the comp into 3D view (via viewer1). In settings > preferences > viewer handles.
Afterward I selected two tracking points on both ends of the tree itself. I tried taking a guess at what tree it was so I did some research of 'common trees that surround rivers' it was something along those lines. After getting the types, I found the tree that was most appropriate - quaking aspen tree. I clicked the two tracking points that I wanted and then right clicked 'scene > add scale distance.' Under the 'scale constraints' tab. I had to take a guess here and guess its overall distance. With this in mind I used the tree average tree size of a quaking aspen tree. I set the distance to '120'


I went back into the 3D view to find out the two tracking points from the quaking aspen tree.
The next thing I did was to find a tracking in which I could set the ground plane. Realistically I set the tracking point on the flat rock of the river itself. I right clicked: 'ground plane' > 'set origin' Furthermore, I did 'ground plane' > 'set Z' on the same tracking point.


The camera's view was different than what I expected after amending the ground plane to setting the 'z' position. I did some trial and error to get the camera back on ground to where it left off.
Once that was out of the way, I added a 'checkerboard' node. From there I was setting the position inside the 3D scene. I did this so I could use the appropriate measurements and scaling for the portal (door). Once I set position to the door into the 2D scene.


Originally this black door is what I was going to use for my composition however, when my teacher, Sam had a look at the black I told him it was a transparent JPEG and he told me that the door itself is a piece of clipart due to how the colors were organized and it wasn't realistic. Believe me when I say that I wanted a realistic door but the door I selected wasnt intentional by any means.


This was the door that I originally worked on however due to its lack of realism and lighting. I went with another door instead. Its a shame it looked cool and I wanted the viewers to shaft their focus when they notice something different or what stands out of the crowd. This psychology method is called the Von
effect.
Now as for the new door, this still has the same psychology effect. Except this time around it actually has proper lighting and is a realistic door. Although there is no transparency, the door has a white background which I can work with. This helps the contrast of the door when I am able to roto scope over the door.
I was waiting on how I could write out my composition. It was only announced this week (at the time of typing this - 05/05/2021) that there was a new video for the quicktime movie render alongside roto, color grading and rendering the clip out. This was also when I had changed my door on 07/5/2021.
For this part I checked to see if I had any lens distortion on the doors. There was a lack of lens distortion and my brain was wondering if that was a good thing or bad thing. After watching through the video of the lens distortion part, I had realised that "ok yeah this is a bad thing but am still confused". At the time of the lens distortion, I asked Sam if the lack of the lens distortion was a good thing. I noticed in his video he had the 'copy', 'premult' and 'roto' nodes. I asked him about this to if they were worth implementing into the composition he said "if it's in the video then do put the nodes in."


Once I sorted out the lens distortion I colour graded the door and 2D scene. This was also where I replaced my door (mentioned earlier on in the blog.). For the colour grading, I picked out the darkest part of the image and the brightest part of the door. On the 'properties' tab, I selected the 'blackpoint' and 'whitepoint' values. I noted this down also. The reason why I had to colour grade the door was to blend it in the scene to make it look realistic and to make a part of the scene.


I added the roto onto the door to remove the white background. If I didn't do that it would look very awful and effortless. I was moving positions for the door to find where would be the most appropriate for the door to sit on the 2D scene. Once I was satisfied of the door's position I went back into the 'grade' node and changed lift and gain values.


Once I got the gain and lift values, I had to write out my VFX portal scene. I wrote it out as H.264 Quicktime movie. This would convert into a video file. From there I rendered the video.


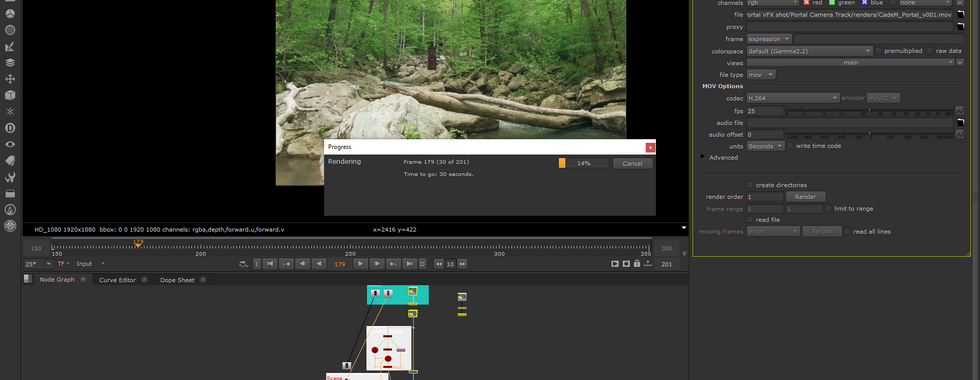


Unfortunately, as I was rendering out the video,. I noticed when I was playing the clip there was no door to be seen. I will ask my teacher why this has happened to me.
The first version of the VFX portal shot.
After discussing what the issue was is that in my 'Camera Track' backdrop node, it was going all the way around and the merge node was connected to the camera track making it go into a loop. Sam also noticed that with the merge node he asked me why my comp was brighter and I mentioned about the forward u and v channels but that wasn't the case here. Going back to my camera track backdrop node, he mentioned that all the arrows were following around each other and this would result in bringing two camera plates into making the comp brighter compared to one camera plate.
After that I rendered out my video and played the video back. I noticed this time the composition had the door.
Here is the final version of the VFX comp:
Overall I am happy with how this has turned out. Thanks to Sam's tutorials videos and VFX practices, this has helped me along the way to create this nice and realistic composition.
Comments