Colour correction and green screening
- Cade-Mason
- Oct 4, 2021
- 3 min read
Updated: Jan 21, 2022
In this workshop, Leigh got us to do color correction and green screening. From google classroom, I grabbed the "Lady_Camera_GS" file, opened After Effects and exported the file in composition. Once I dragged the video into the composition timeline, I went into "effects and presets" and searched for "Keylight" and dragged it onto the composition. With the eyedropper tool for colors, I select a color that was right next to the woman and the green screen went black. In the drop down menu for "Keylight" under composition timeline. In the "view" area of AE I went from "final result" to "screen matte". In the "screen matte" options. I adjusted the "Clip white" to adjust the holes for the silhouette in order to make things neater and better. I changed the "view" back to "final result to see what the result looked like. There were still green screen around the outline of the edges themselves. To confirm the green screen worked, I opened up the solid settings and went with a red color solid fill.


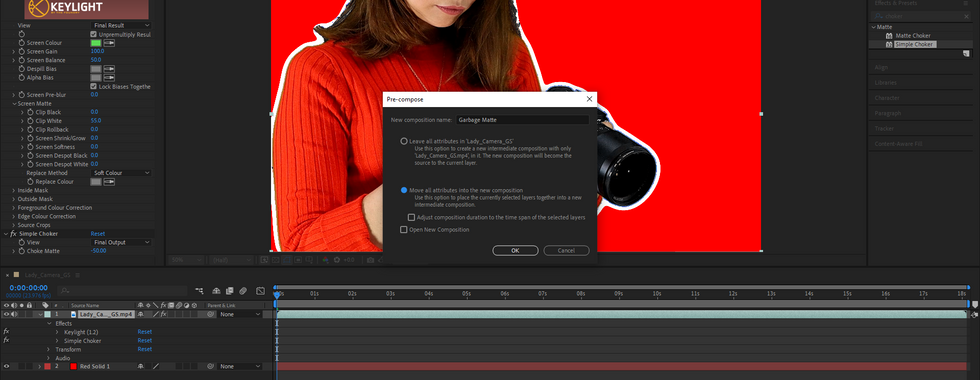
I dragged the "Red_Solid_1" layer under the "Lady_Camera_GS" layer. Going back to "Keylight" in the "Lady_Camera_GS" layer, I changed the view results back to "Screen Matte" I made further adjustments to "Clip White" and added "Choker" under "effects and presets". I noticed that after adding the choker, I saw the white outline from the clip white. Once I was satisfied, I "pre-composed" the composition and the new pre-compose is called "Garbage Matte" and selected the "Move all attributes into the new composition" option. This will place all selected layers together into a new intermediate composition. In the new composition, I searched for "Keylight" and selected the "Keylight_Cleanup_Suppressor". I changed views multiple times going from "source" to "intermediate result". I changed the "alpha contrast" under the "key cleaner" settings from "0%" to "10.0%". I also changed composition views from "Lady_Camera_GS" to "Garbage Matte" I also activated the "Keylight_Cleanup_Suppressor" by using the "FX" button.


I downloaded a video from Pexels however, the first video I downloaded, was a mis match in dimensions. I checked the dimensions for the camera girl video and that was 1920x1080 and the first pexels video was 3840 x 2160 so I went back onto pexels and downloaded the "full HD" video (1920 x 1080) and implemented the vid into the composition.
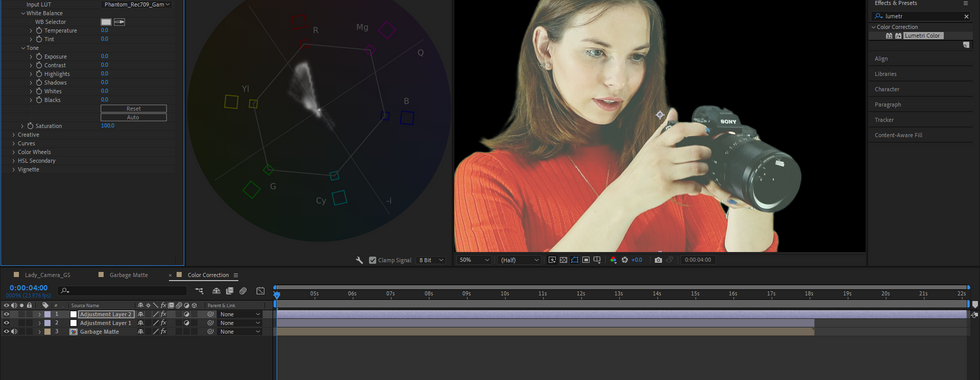
Then I selected the "composition" to "pre-compose" and selected the option: "Move all attributes into the new composition" and renamed the comp to "Color Correction." In the composition timeline, I added a new "Adjustment layer" in the "Color Correction" comp. In the "window" options I opened up "Lumetri Scopes" window then in that window I right-clicked and selected "Vectorscope YUV" in which would open up the graph with the white waves. Ideally we cannot have the whit waves going up to a 100 and these white waves act as the light and I adjusted the blacks and whites to see how the waves flow when I adjusted them. I right-clicked in the "Lumetri Scopes" tab and selected "Presets > Vectorscope YUV" this opened up the a circle for the color wheel. The majority of the white waves are around the red (R) area. The other areas consisted of:
MG (Magenta), YL (Yellow), G (Green), Cy (Cyan), B (Blue) and R (Red).
I changed the saturation values from "100" to "113.0." I added a second adjustment layer called "Adjustment Layer 2". In the "Color Correction" I added the "Lumetri Color" effect to "Adjustment Layer 2". The second adjustment layer would act as a LUT (Look Up Table). In the LUT, I downloaded and tried the different LUTs to get the appropriate lighting and to match the lighting in the background itself. The reason for this is to make it look like the scene itself is blended in.
The last thing I had yet to do was for the scene I noticed in the first four seconds, the camera adjusted the positions (whereas the background wasnt) up to the ladys face which wasnt apparent at the time. There was inconsistencies so I just deleted the first four seconds of the lady camera clip.


Here is the video!
Overall, it was a good workshop session and a nice way to recap with After Effects. Although the color correction were new to me whereas green screen I was already familiar with.

Comments